Connect to an MQTT broker
Add a broker connection and check that a subscribed message arrives.
Before you start
You need a running broker and its connection details. In the Web UI, the broker address must be reachable from the MQTT Viewer server. 127.0.0.1 means that server’s own machine.
1. Enter the connection details
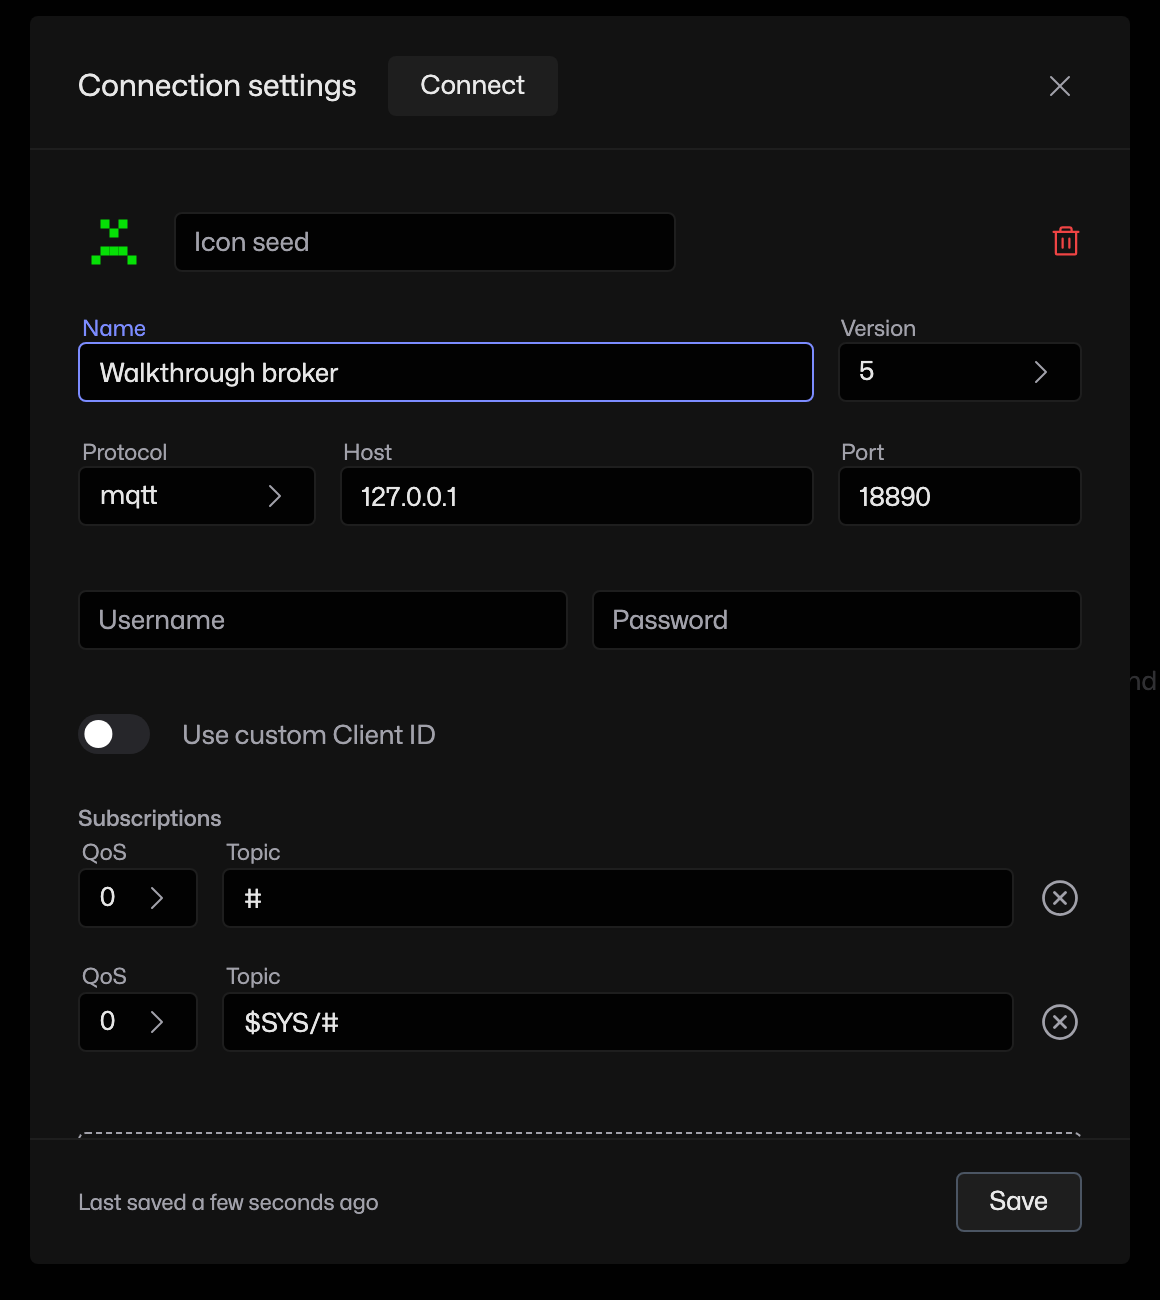
Click Add Connection. Give the connection a Name, then enter the broker’s Host and Port. Choose the Protocol and MQTT Version your broker supports.
2. Check your subscriptions
In Subscriptions, keep a topic filter that matches the messages you want. The default # receives ordinary topics your broker permits. For this example, walkthrough/# is enough. Enter a username and password only if your broker requires them.
3. Connect and receive a message
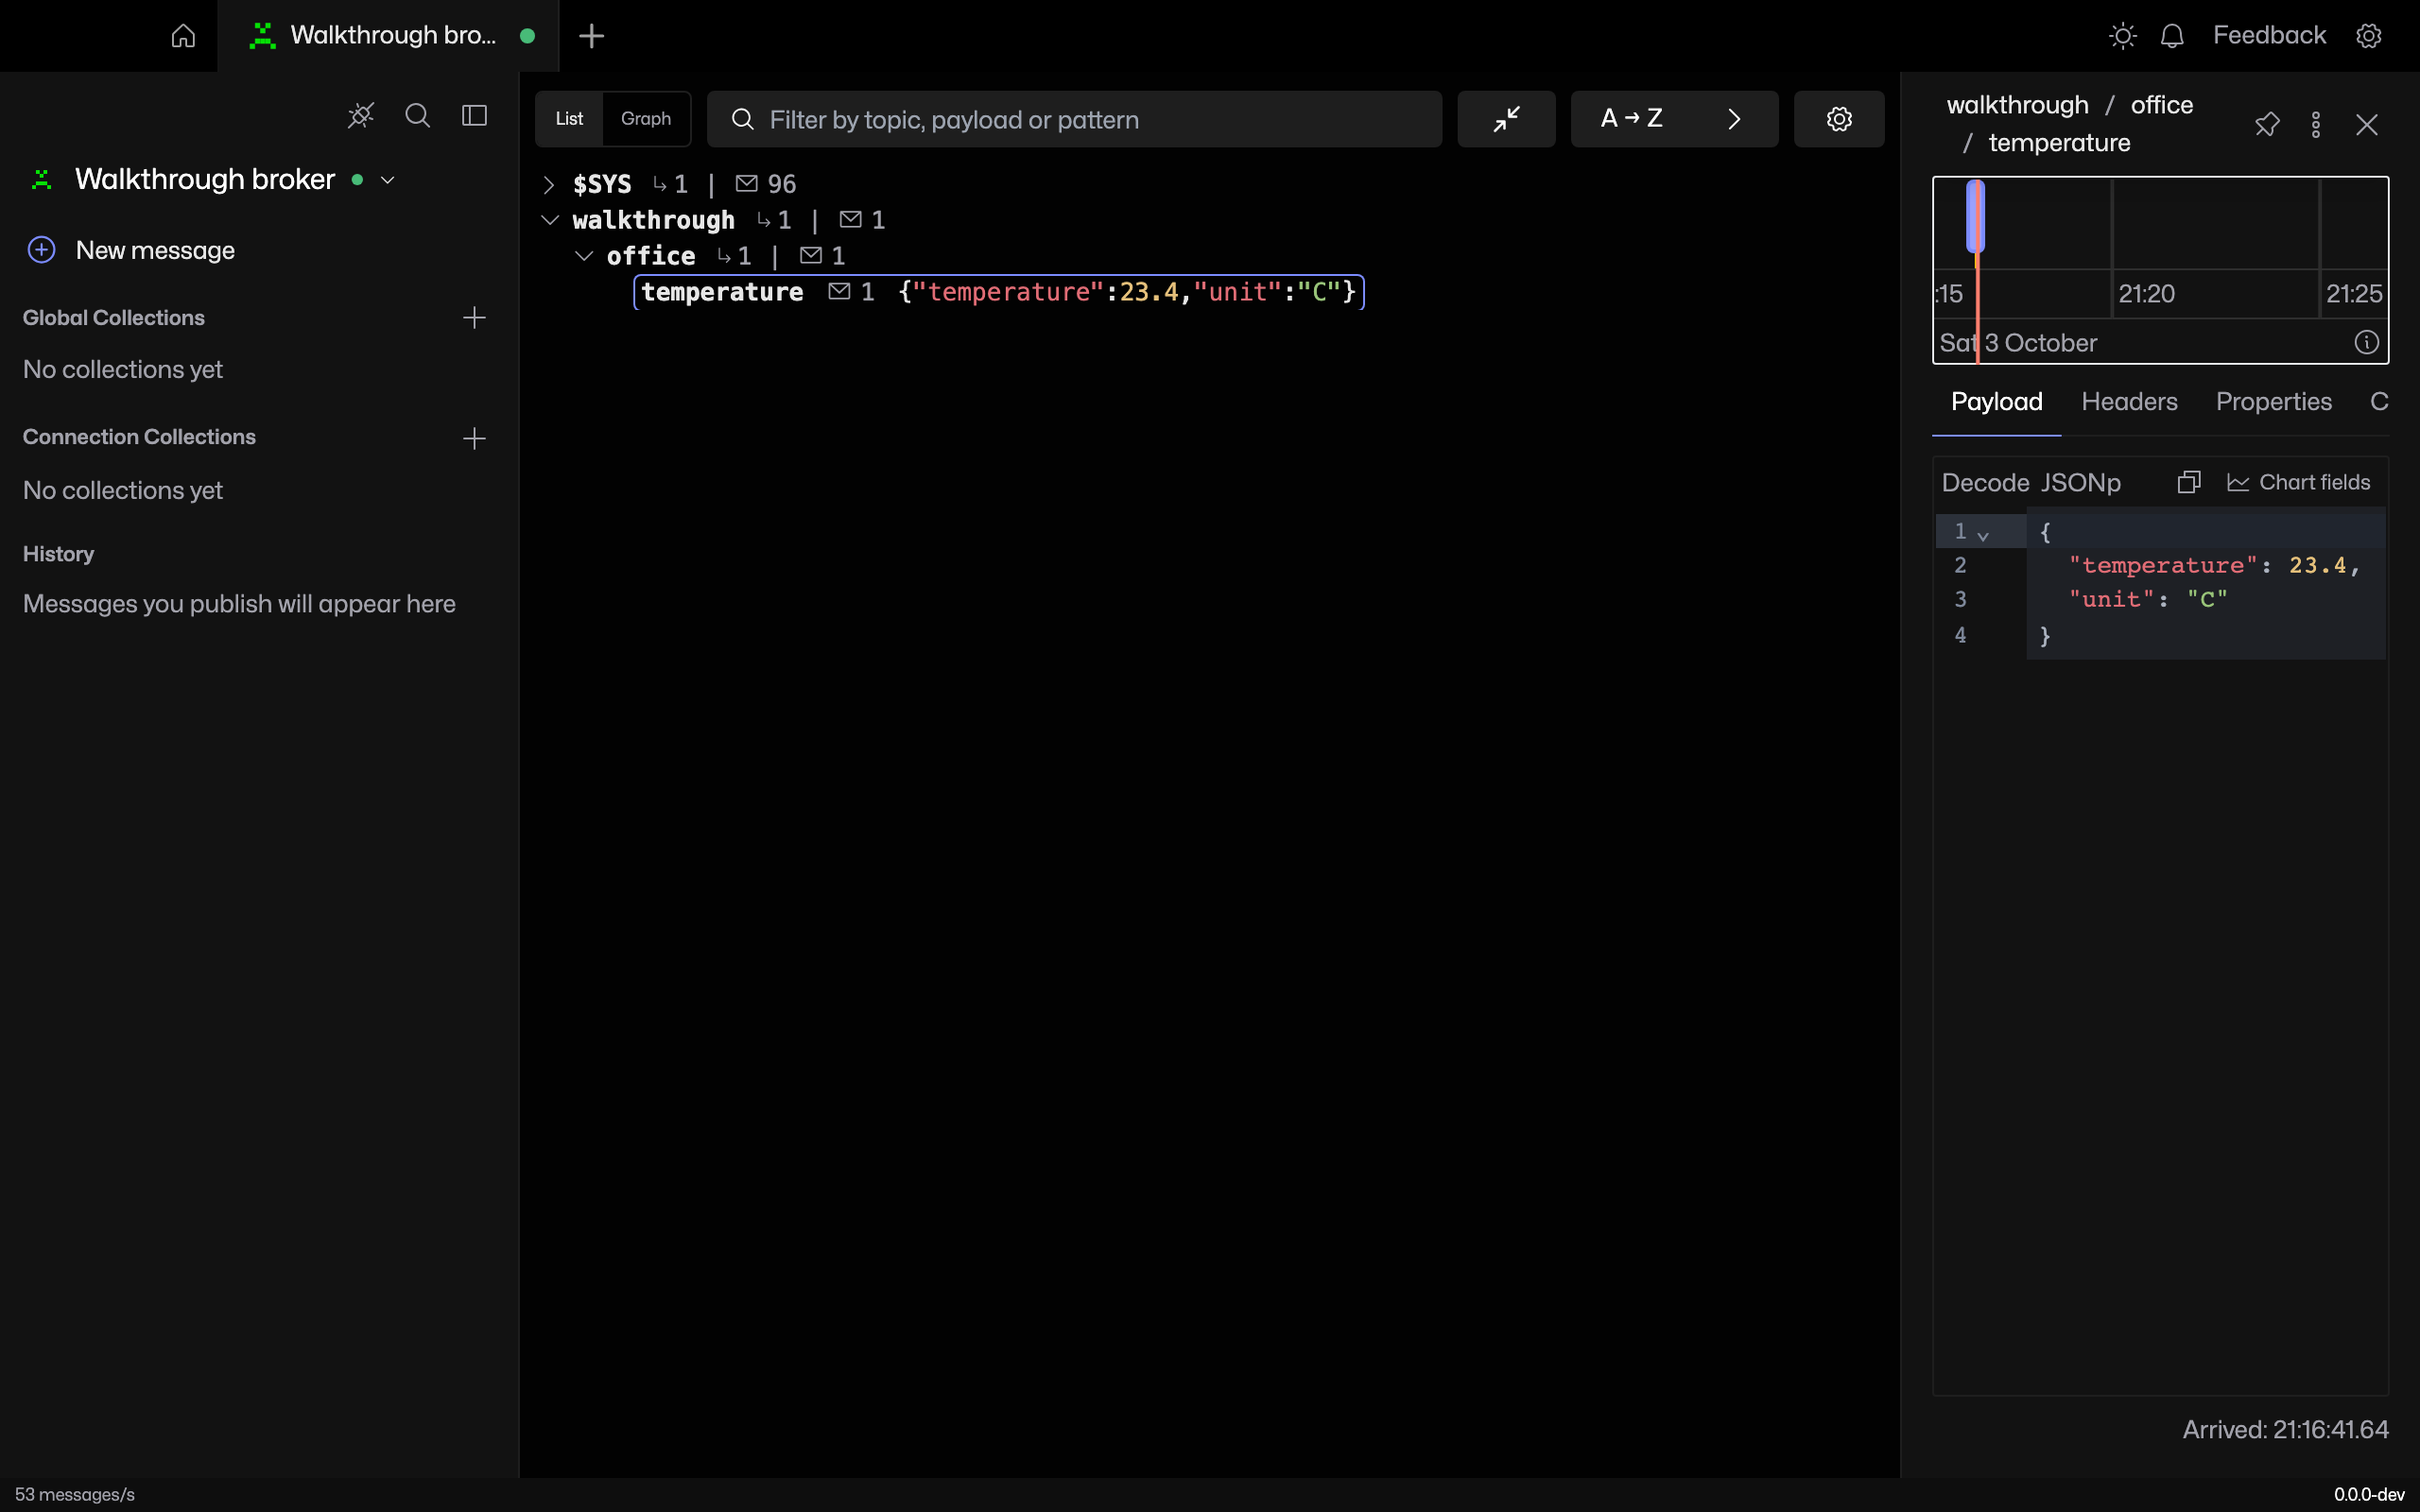
Click Connect, then Save to close the settings. Publish a test message to a subscribed topic. In List, expand the topic tree and select the message.
If connection fails
Open the connection menu and choose View logs. Check the host, port and protocol first. To change locked fields, open Edit connection… and click Disconnect. The fields save as you type when valid. Reconnect after correcting them.